
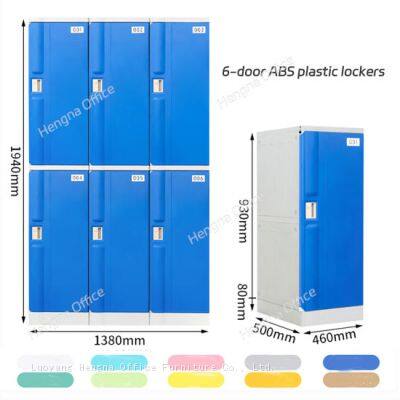
How to Install Knock-down ABS Lockers: A Step-by-Step Guide for Facility Contractors
For facility contractors and project managers, time is money. Installing permanent, welded locker systems often involves complex logistics, specialized labor, and significant on-site time. Knock-down (KD) ABS plastic lockers offer a modern, efficient alternative that can dramatically streamline the installation process, reduce project timelines, and lower overall labor costs. However, to fully realize these benefits, a correct and methodical installation is key.
This guide is designed for professional installers. It provides a clear, step-by-step walkthrough for assembling and installing KD ABS locker banks, ensuring a secure, level, and professional finish that will last.
Pre-Installation: Planning & Preparation
A successful installation begins long before the first part is unpacked. Proper planning prevents delays and errors.
1. Site Inspection & Preparation:
Floor Condition: The floor must be clean, level, dry, and structurally sound. Use a long spirit level to check for levelness across the entire installation area. For uneven floors (common in older facilities), be prepared to use shims during the leveling step.
Wall Condition: If the design calls for wall-fixing (recommended for tall banks), ensure the walls are plumb and made of suitable material (concrete, solid block, or sturdy studs) for secure anchor fixing.
Space Verification: Double-check the planned layout against the delivered units. Confirm clearances for doors, walkways, and accessibility requirements. Remember to account for base plinth height if included.
2. Inventory & Tool Check:
Unpack all crates in a clean, spacious area near the installation site. Lay out components systematically. Verify the inventory against the packing list. Missing a single bracket can halt progress.
Essential Tools & Materials Checklist:
| Category | Items Needed | Notes |
|---|---|---|
| Tools | Rubber Mallet, Cordless Drill/Driver, Phillips Head & Flathead Screwdrivers, Spirit Level (4ft recommended), Measuring Tape, Pencil, Step Ladder, Soft-faced Mallet or Dead Blow Hammer | A rubber/soft mallet is crucial for tapping ABS parts without damage. Avoid metal hammers. |
| Hardware (Usually Included) | Assembly Screws/Bolts, Connector Brackets, Wall-Anchor Kits, Base Feet/Shims, Door Hinges & Lock Hardware | Check the manufacturer’s manual for specific types. |
| Consumables | Shim Material (composite or plastic), Silicone-based Lubricant (for door adjustments) | Avoid petroleum-based lubricants on plastic. |
| Safety Gear | Safety Glasses, Gloves, Knee Pads |
Step-by-Step Assembly & Installation Guide

Follow these steps methodically. Most KD systems use a mortise-and-tenon or bracket-and-post design.
Phase 1: Sub-Assembly (On the Ground)
Best done in a clear area near the final location.
Step 1: Assemble the Locker Carcass.
Typically, one locker cell (the box without doors) is assembled at a time. Lay the side panels, top, bottom, and back panel on a protected surface (e.g., cardboard). Connect them using the provided connector bolts, brackets, or by tapping pre-molded tenons into mortises. Use the rubber mallet for a snug fit—do not force. Finger-tighten all bolts initially.
Step 2: Install Internal Components.
Before standing the unit up, install any shelves, clothes rods, or dividers as per the design. These usually clip or screw into pre-molded slots.
Step 3: Assemble Door Frames (if applicable).
Some systems have separate door frames. Connect the stiles and rails, ensuring they are square.
Phase 2: Positioning & Leveling (The Critical Stage)
Step 4: Position the First Carcass.
Carefully lift and place the first assembled locker carcass in its planned starting position (usually at one end of the run or in a corner). If the system has a separate base plinth, install and level that first.
Step 5: Level and Shim Front-to-Back & Side-to-Side.
This is the most important step for door operation and stability.
Place the spirit level across the top of the carcass from side to side and front to back.
If not level, insert shims under the base at the necessary points. The unit must be perfectly level in both directions. Tap shims gently until the bubble is centered.
Do not overtighten the carcass bolts yet; final tightening happens after the entire bank is leveled.
Step 6: Join Subsequent Carcasses.
Position the next carcass adjacent to the first. Join them using the interlocking sides or the provided connector brackets. Ensure the top, bottom, and front faces are flush. Repeat the leveling process (Step 5) for each new unit, shimming as needed. A perfectly level first unit makes leveling subsequent ones much easier.
Phase 3: Final Fixing & Door Installation
Step 7: Secure the Entire Bank.
Once the desired number of lockers are joined and leveled as a single bank:
Final Tightening: Systematically go through and fully tighten all internal carcass connector bolts.
Wall Fixing (Highly Recommended): For banks over 2 lockers high or 3 lockers wide, secure the assembly to the wall. Use the provided anchor points (often at the top of the back panel). Drill into the wall structure and use appropriate anchors (e.g., for concrete or steel studs). This prevents tipping and ensures rigidity.
Step 8: Hang the Doors and Install Hardware.
Attach hinges to the doors as per instructions.
Hang the doors onto the hinge mounts on the carcass. Use shims under the door during installation to ensure even gaps.
Adjust hinges as needed so all doors open and close smoothly and align correctly with their neighbors. A small amount of silicone lubricant on hinge pins can help.
Install lock cylinders, handles, or latch mechanisms.
Step 9: Final Inspection & Clean-up.
Open and close every door to check for smooth operation and alignment.
Visually inspect the entire bank for flush panels and consistent gaps.
Remove any protective film from panels.
Clean the lockers with a mild, non-abrasive cleaner to remove fingerprints and dust from installation.
Why KD Installation is a Contractor's Advantage
Beyond the obvious space and freight savings, the KD model offers tangible on-site benefits:
| Traditional Welded Bank | Knock-Down (KD) ABS System |
|---|---|
| Delivery: Requires a large, clear path and often a forklift to move heavy, awkward units. | Delivery: Boxes are palletized, manageable with a hand truck, and can be moved through standard doors and elevators. |
| Installation: Requires multiple laborers to maneuver heavy units; alignment is fixed. | Installation: Two workers can easily handle components. Leveling compensates for imperfect floors. |
| Flexibility: Fixed configuration. Errors in layout planning are costly to rectify. | Flexibility: Layout can be adjusted on-site if needed. Units can be reconfigured later for facility changes. |
| Damage Risk: Scratching or denting during installation is common and difficult to repair. | Damage Risk: Minor. Individual damaged panels can often be replaced without dismantling the entire bank. |
Best Practices & Pro Tips
Two-Person Job: Always have at least two people for lifting, positioning, and ensuring parts align during assembly.
Follow the Sequence: Do not skip the "level as you go" step. Trying to level a fully assembled, 10-locker bank is nearly impossible.
Avoid Over-Torquing: When tightening bolts into plastic threads, stop when snug. Over-tightening can strip the threads.
Protect the Finish: Use tools with soft surfaces when contacting visible parts. Keep protective film on until the end.
Review Manufacturer Guides: While this is a universal guide, always consult the specific manual for your product, as connection methods can vary.
Installing knock-down ABS lockers is a straightforward process that prioritizes logic and precision over brute force. For contractors, mastering this efficient method translates directly into reduced labor hours, fewer callbacks for alignment issues, and a satisfied client with a clean, durable, and professional-looking installation. By treating the leveling and fixing phases with the care they require, you ensure the locker bank performs flawlessly for its entire lifespan, making it a smart choice for modern facilities focused on value and flexibility.
Recently Posted
-
Why Water Park Lockers Always Rust — and the Practical Logic Behind Switching to ABS Waterproof Stor
April 29, 2026Run a water park, and you've probably seen this: metal lockers installed last year are already showing it. Hinges that stick, Read More
 -
How to Choose ESD Workbenches for Bulk Order: A Procurement Guide to Quality, MOQ and Lead Time
April 20, 2026Buying one ESD workbench is simple. You find a supplier, pay the invoice, receive the unit, plug it in.Buying 50 — or 500 — is a d Read More
 -
ESD Workstation Audit Checklist: What Inspectors Actually Look For in Labs and Electronics Manufactu
April 20, 2026If your ESD workstation fails an audit, the consequences go beyond a failed inspection report. It means your production line stops Read More
 -
Why Your ESD Workstation Keeps Failing: Root Causes and Practical Fixes for Industrial Settings
April 20, 2026ESD workstations are supposed to eliminate static discharge risk in sensitive manufacturing environments. But if your equipment ke Read More

Contact Us
Recommended Products
-
 Industrial-Grade ABS Plastic Locker for Factory Staff and Warehouse Workers|Hengna OfficeUS$ 19 - 100MOQ: 5 Sets
 -
Outdoor ABS Locker Cabinet – UV-Resistant Plastic Storage for Poolside or Beach Resorts-Hengna OfficeUS$ 19 - 100MOQ: 5 Sets
-
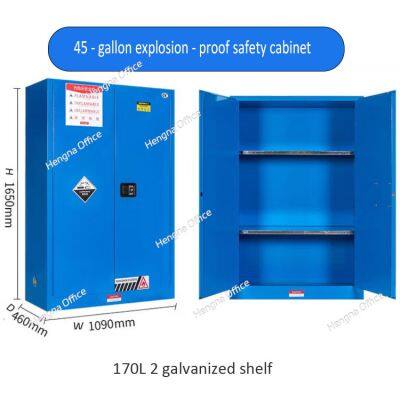
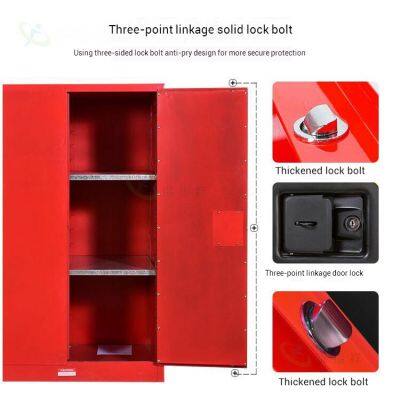
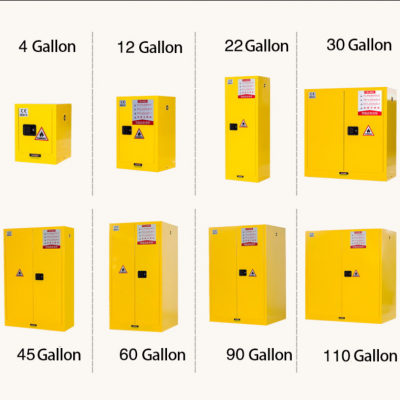
45 Gallon Explosion-Proof Flammable Liquid Storage Cabinet – Fire-Resistant Steel Safety Cabinet for FactoriesUS$ 68 - 400MOQ: 2 Combos
-
Flammable Storage Cabinet for Flammable Liquids – OSHA Certified Safety Cabinet With Fireproof Double WallsUS$ 68 - 400MOQ: 2 Combos
-
Large Capacity Flammable Liquid Storage Cabinet – Explosion-Proof Safety Cabinet for Laboratory & Workshop UseUS$ 68 - 400MOQ: 2 Combos
-
Heavy Duty Steel Tool Cart With Drawers for Workshops|Hengna OfficeUS$ 99 - 269MOQ: 2 Cases
-
Wholesale 3-Drawer Tool Trolley With Wheels for Factory and Garage StorageUS$ 99 - 269MOQ: 2 Cases
-
HN-wlj160 Industrial Rolling Tool Organizer With Pegboard|All-in-One Mobile Tool Storage CartUS$ 5 - 120MOQ: 2 Cases
-
White Stackable Pathology Wax Block Storage Drawers for Labs Near London-Hengna OfficeNegotiableMOQ: 10 Pieces
-
Custom Paraffin Block Storage Cabinet for Histology Laboratories – Factory Direct From Hengna FurnitureNegotiableMOQ: 10 Pieces

-
Smart Phone Charging Locker 40-door|Fingerprint Lockers Intelligent Parcel Delivery CabinetUS$ 203 - 750MOQ: 15 Pieces
-
School Gym Lockers Price |Parcel Delivery Storage Locker 12-door FactoryUS$ 203 - 750MOQ: 15 Pieces
-
Multi Metal Work Benches Electrical Workshop Workbench|US$ 300 - 800MOQ: 2 Cases
-
Commercial Workbench Supplier |Multi Metal Work Bench With Drawers OMDUS$ 300 - 800MOQ: 2 Cases
-
Pathological Ection Cabinet JTGZ062 Wax Block Cabinet for LaboratoryNegotiableMOQ: 10 Pieces

-
Durable Tool Storage in Factory HNGJ703 Hard Wearing Metal Industrial Tool ChestNegotiableMOQ: 18 Pieces
-
High - Quality CNC Workshop Tool Cabinet Heavyweight Workshop Tool OrganizerNegotiableMOQ: 10 Pieces
-
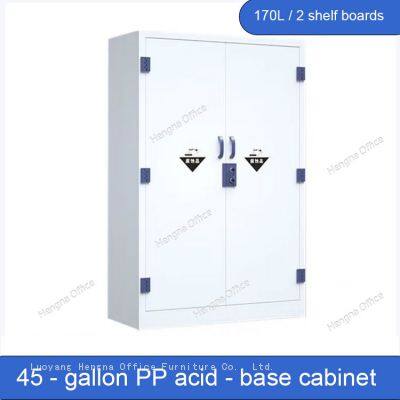
Laboratory Polyethylene Acid and Corrosive Chemicals Safety Storage PP CabinetUS$ 340 - 600MOQ: 5 Combos
-
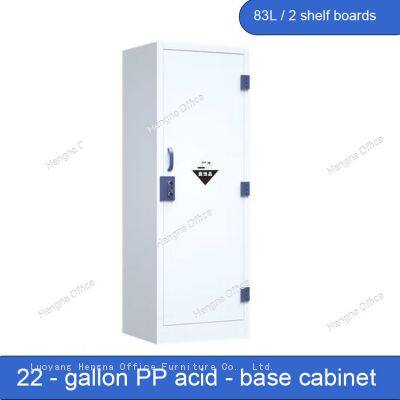
22 Gallons /80 L PP Acid - Base Cabinet: Safeguard Chemical Storage Supplier OEMUS$ 500 - 600MOQ: 5 Combos
-
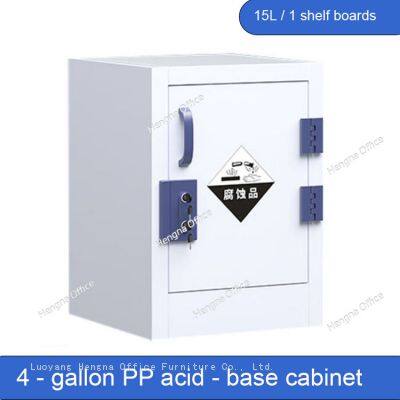
4 - Gallon Corrosion-resistant Safety Cabinet for Hazardous Chemicals Acid SupplierUS$ 340 - 500MOQ: 5 Combos